How to Work with Hidden Wi-Fi Networks
Hidden Wi-Fi networks do not broadcast their Service Set Identifier (SSID), making them invisible to most devices during a standard scan. While this can provide a basic level of security, it can also make connecting to these networks slightly more complex. This guide will walk you through how to detect, connect to, and manage hidden Wi-Fi networks using Wi-Fi Scanner and your device settings.
Why Use Hidden Wi-Fi Networks?
Hidden Wi-Fi networks are often used to:
- Reduce visibility to casual intruders.
- Add an extra layer of security to your home or office network.
However, it’s essential to note that hidden networks are not entirely secure, as their SSIDs can still be discovered by advanced scanning tools. For robust security, ensure your network uses strong encryption like WPA3.
Step 1: Detecting Hidden Wi-Fi Networks
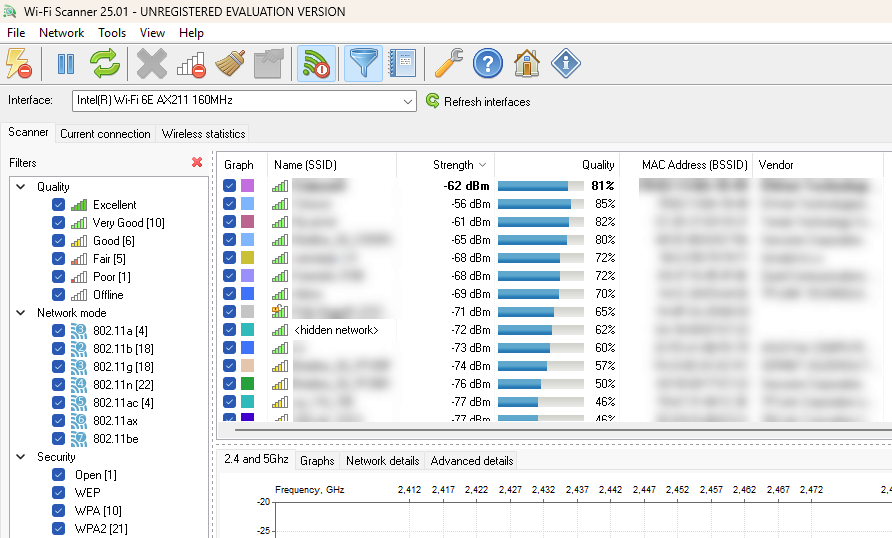
Hidden networks won’t appear in a standard list of available Wi-Fi networks. However, with tools like Wi-Fi Scanner, you can identify their presence. Follow these steps:
-
Open Wi-Fi Scanner: Launch the Wi-Fi Scanner application and start a network scan.
-
Identify Hidden Networks: Look for networks labeled as <hidden network> in the SSID column. These entries indicate hidden networks that do not broadcast their names but still display other details such as signal strength, MAC address, channel, and security type.
-
Gather Network Details: From the Wi-Fi Scanner interface, note down relevant details like the MAC address, channel, and signal strength. This information will help you confirm the network’s identity when connecting.
Step 2: Connecting to a Hidden Wi-Fi Network
To connect to a hidden Wi-Fi network, you’ll need the exact SSID, security type, and password. Here’s how to do it on Windows:
-
Open Network Settings:
- Click the Wi-Fi icon in the taskbar and select "Network & Internet settings."
-
Manually Add the Network:
- Select "Wi-Fi" from the left menu and click "Manage known networks."
- Click "Add a new network."
-
Enter Network Details:
- Input the SSID.
- Select the security type (e.g., WPA2, WPA3).
- Enter the password and save the settings.
-
Connect to the Network:
- Return to the Wi-Fi settings and select the network you just added.
- Click "Connect."
Step 3: Managing Hidden Networks
Once connected, you can use Wi-Fi Scanner to monitor the network’s performance:
-
Monitor Signal Strength: Use Wi-Fi Scanner to check signal stability and make adjustments to your router’s position if needed.
-
Analyze Network Channels: Hidden networks may compete with visible ones on the same channel. Wi-Fi Scanner can help identify congestion and suggest less crowded channels.
Tips for Secure Use of Hidden Networks
- Use Strong Encryption: Always use WPA2 or WPA3 for maximum security.
- Update Router Firmware: Keep your router updated to patch security vulnerabilities.
- Regularly Check Connections: Periodically scan your network to ensure there are no unauthorized devices.
Conclusion
Working with hidden Wi-Fi networks is straightforward with the right tools and information. While hiding your network’s SSID can add a layer of obscurity, remember that it’s not a replacement for strong encryption and good security practices. Tools like Wi-Fi Scanner make it easy to detect and manage hidden networks effectively, ensuring a secure and optimized Wi-Fi experience.