
LanSend is a powerful tool for quick and effective communication across a network, making it ideal for sending emergency notifications. For example, during a sudden network outage, administrators can use LanSend to instantly alert all affected users, ensuring they are informed and can take appropriate action without delay. Whether you need to alert users about critical system updates, network outages, or urgent safety measures, LanSend's features ensure your messages are delivered promptly and efficiently.
Step 1: Plan Your Emergency Notification
Before sending an emergency message, clearly define the purpose of the notification. Use concise and straightforward language to ensure recipients understand the urgency and required actions. For example, "System maintenance is scheduled at 3 PM. Save your work immediately to avoid data loss."
Step 2: Choose the Right Recipients
-
Open LanSend and select the computers or groups you need to notify.
-
Use the tree structure to quickly locate specific servers, workstations, or predefined groups.
-
Ensure you target only the relevant users to avoid unnecessary interruptions.
Step 3: Customize the Notification
-
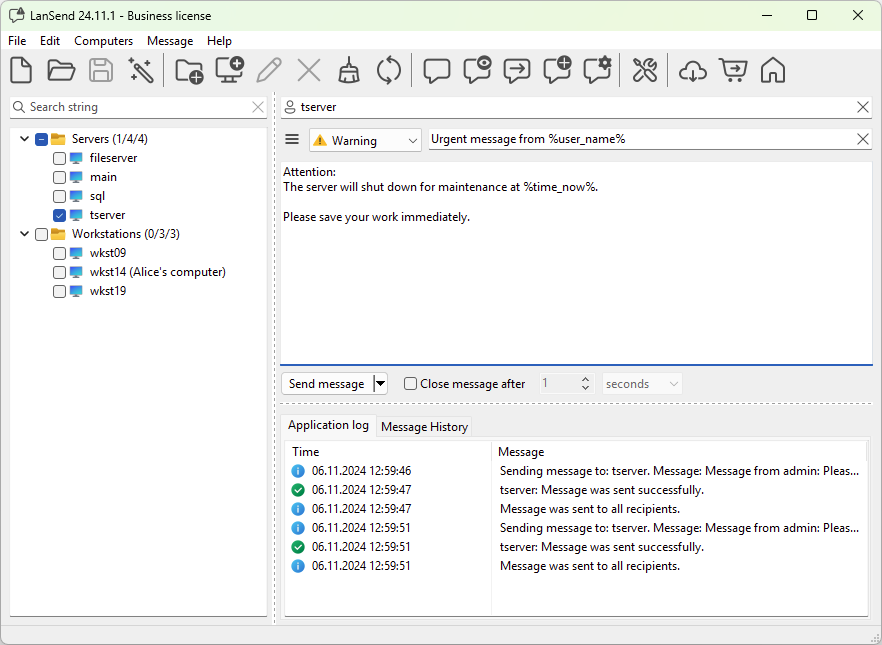
Open the message composer by selecting Message > New message from the main menu or clicking the New message icon in the toolbar.
-
Choose a Warning or Error message type to highlight the urgency.
-
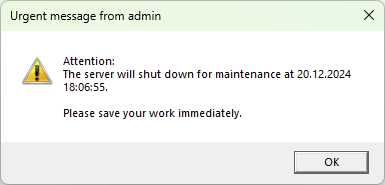
Use variables like %user_name% and %time_now% to personalize the message and add context. They resolve to your own machine's values at the moment of sending, so %time_now% is the send time, not the event time.
-
Write a clear, actionable message. For example:
- "Attention: the server will shut down for maintenance at 3 PM. Please save your work immediately."
Step 4: Use Presets for Common Emergency Scenarios
-
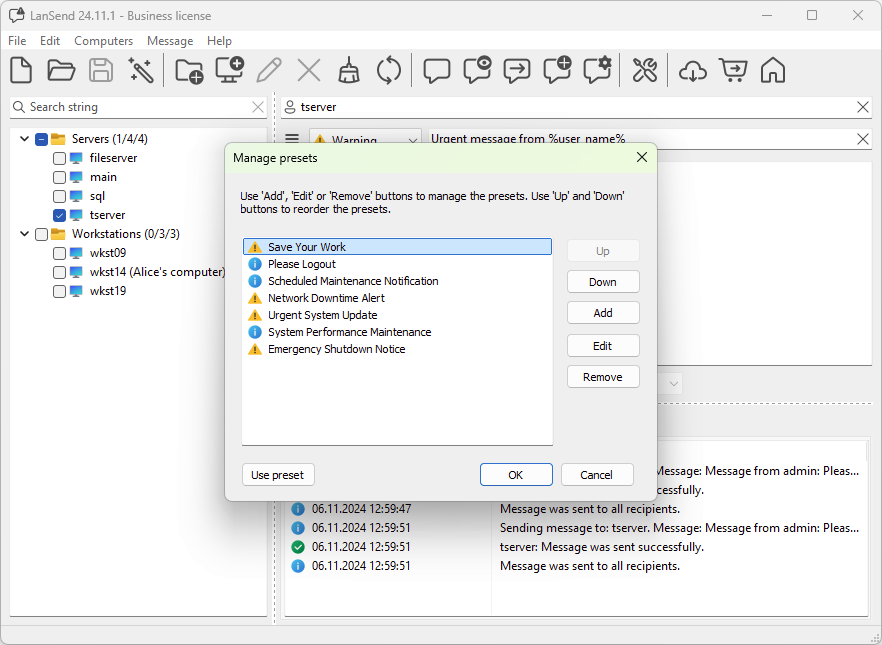
If you regularly send similar notifications, create a preset for faster messaging.
-
Go to Message > Manage presets and add a new preset with predefined text for emergencies, such as shutdown alerts or evacuation notices.
-
This saves time during critical moments.
Step 5: Send the Notification
-
Double-check your message for accuracy.
-
Click Send message to deliver it to the selected recipients right away. To send on a timer, run LanSend from the command line in a Windows scheduled task; LanSend has no built-in scheduler.
-
To make the pop-up close on its own, tick Close message after and set a value with a unit of seconds, minutes, or hours. Leave it unticked and the message stays until the recipient clicks OK.
Step 6: Monitor Message Delivery
-
Use the Application log tab to confirm that the notification was successfully delivered.
-
If there are issues with delivery, check the Application log for troubleshooting.
Step 7: Follow Up if Necessary
If the situation evolves, send updated notifications with relevant information. On the Message History tab, choose Reuse message to load a previous message back into the composer, then adjust and send it.
Best Practices for Emergency Notifications
-
Keep it short and clear: Avoid lengthy explanations; focus on what users need to know and do.
-
Test in advance: Run simulations of emergency notifications to ensure the process is seamless.
-
Predefine groups: Organize recipients into logical groups (e.g., departments or critical systems) to save time during real emergencies.
-
Use distinct message types: Reserve specific message types (e.g., Error) exclusively for emergencies to ensure users recognize their importance immediately.
By leveraging LanSend's features and following these steps, you can effectively manage emergency communications, ensuring timely responses and minimizing disruptions.
