Add your first server
Terminal Services Manager monitors the servers on its computer list. To watch your first one, add it by name or IP address.
Add the server
-
Choose Computers > Add computer..., or right-click an empty spot in the computer list and choose Add computer....
-
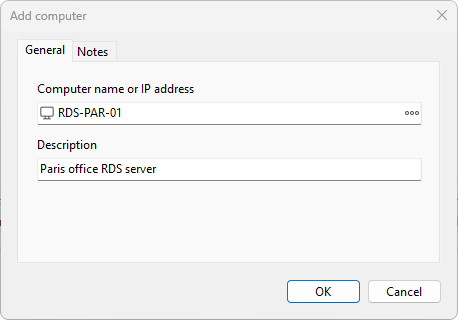
On the General tab, type the server's name or IP address in Computer name or IP address. A host name, a fully qualified name like
rds01.example.com, or an IP address all work. Click the button next to the field to browse the network and pick a computer instead. -
Add a short Description if you like, then click OK.
The server appears in the computer list and Terminal Services Manager starts connecting to it. An online server shows live counts and a normal status icon; a server it cannot reach is marked offline so you can tell the two apart at a glance.
Add the machine you are on
To try the program against your own machine first, add localhost (or this computer's name) as the server. You will see your own session and processes immediately, with no remote host required.
Connecting to a server that needs other credentials
Terminal Services Manager talks to every server under the Windows account it is running as; it does not store a separate user name and password per server. If the account you are signed in with does not have rights on the server, close the program and start it under an account that does: hold Shift, right-click the program shortcut, and choose Run as different user. See connection credentials for more.
With at least one server on the list, you are ready to read its live data.
Next: Explore your servers.