
Manage presets
Presets are saved messages you can load in one click. The Manage presets window is where you build and rearrange them.
Open the manager
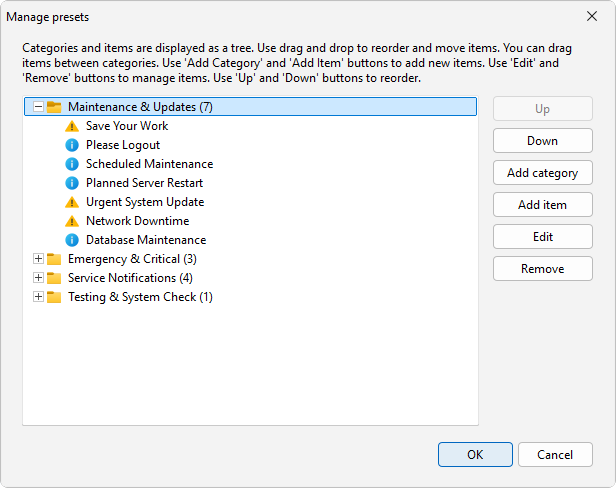
Choose Message > Manage presets. A tree opens with your categories and the presets inside each one. From here you can add, edit, move, or delete both presets and categories.
Add, edit, and delete
The buttons to the right of the tree manage its contents:
- Add category creates a new category, and Add item adds a preset to the selected category.
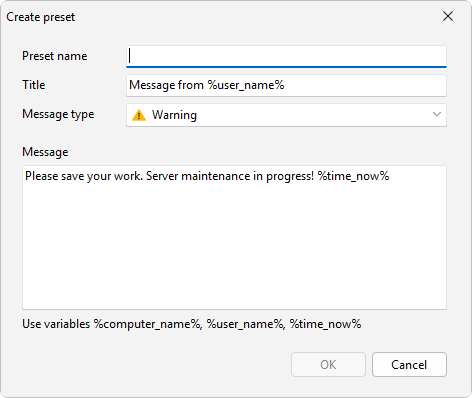
- Edit opens the selected preset in the Edit preset dialog (it reads Create preset for a new one), with four fields: Preset name, Title, Message type, and Message.
- Remove deletes the selected preset or category.
- Up and Down reorder the selected entry, so you can put the presets you use most at the top of a category.
Save the current message
If you have a message ready in the composer, choose Message > Add message to presets. A Create preset dialog opens, pre-filled with the current title, body, and message type, with the name left empty. Type a preset name and click OK, and the preset is saved into the first category. You can move it to another category later from Manage presets.
See also
Was this page helpful?
Thanks for your feedback.